
Adobe Connect Event / Meeting Caption Embed Instructions
Notes:
- Live captioning in Adobe Connect currently only works for Classic View and not in Standard View. For better experience, use the external ICS weblink provided for the session to share with your attendees.
- For reference, see Closed captioning in Adobe Connect
- Free automated loop test available on request, contact services@maplecomm.ca to schedule a time.
Adobe Connect event captioning is simple with Maple’s solution. Follow these instructions below to make your event accessible to all participants.
For Adobe Connect meeting organizers:
Step 1: Download the Captioning Pod. There is a ZIP file containing the captioning pod available here:
We suggest you click the link and choose “Save As…” from the menu of options so that you can specify where the file will be downloaded on your computer.
Once downloaded, extract the ZIP file to a temporary folder.
Step 2: Add the Pod to Your Adobe Connect Meeting
Open the Adobe Connect meeting and follow the instructions you find on the website to begin your meeting.
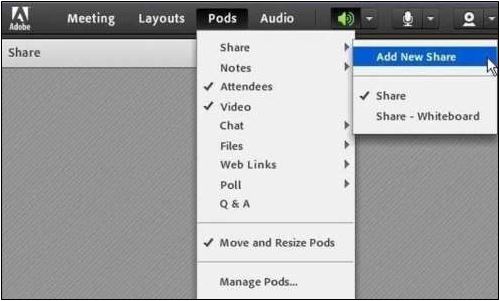
Once your meeting is running, select the following menu item: Pods > Share > Add New Share
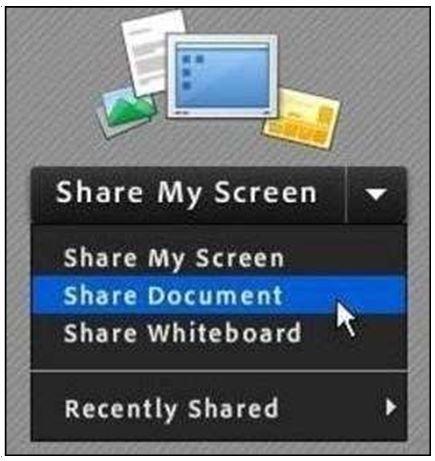
In the new window, click the dropdown arrow next to Share My Screen and choose “Share Document”:
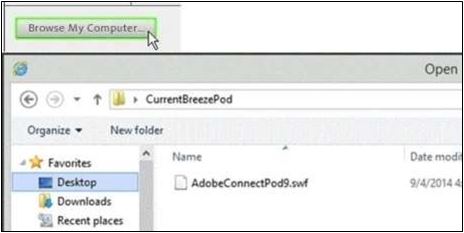
In the new window, click the “Browse My Computer” button at the bottom left and find the CC pod where it was saved. Double click that file, and the pod will begin to load.
Step 3: Initiate Captioning
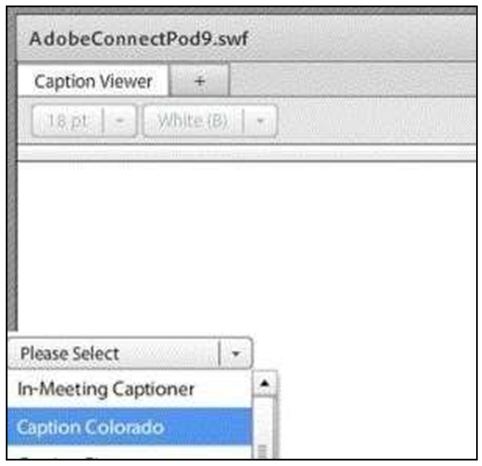
Once the pod is loaded, click on the plus (+) icon near the top of the pod. This will activate the menu bar, which provides the connection configuration. The dropdown menu next to Provider is where you will select “Caption Colorado.”
- In the dialog boxes, enter the following settings:
- Host: connect.captioncolorado.com
- ID: Enter your event ID / Confirmation Number (Note: The Event ID / Confirmation Number should have been received by the person who ordered the event from VITAC/Maple as part of their confirmation email.)
- Port: 80 (Note: Try port 11100 if the Connect button in a later step does not work) Name can be your choice

Click the Connect button to connect to Caption Colorado. Once you are connected, the tab will be updated showing the connection name and a yellow triangle indicating that the connection has been made.
Check the “Broadcast Captions” checkbox – this allows captions to flow through into the meeting through the captioning pod. The tab will update with a green checkmark indicating that the captions are flowing. Your
meeting is now ready to receive captioning and you may click the “Caption Viewer” tab.