
Zoom Instructions – Live Captioning
Notes:
- Once the Zoom room is setup for live captioning, attendees can enable/disable the CC button to see captioning. Alternatively, share the external ICS (Internet Caption Stream) weblink, which we will provide you with in the confirmation email that you receive after booking a captioner; and share this ICS weblink with your attendees to view caption on their computer or mobile devices using a web browser. There’s nothing to install including plugin/extension/addon for web browser. When viewing caption using the ICS weblink on a computer, it’s recommend to view using a second monitor or on a second device (e.g. laptop or tablet).
- Free automated loop test are available on request, contact services@maplecomm.ca to schedule a test ahead of time.
- Now, both Microsoft Teams and Zoom have auto-captioning capability in English for live meetings. This may be helpful to some participants however it should not be relied on for accuracy. Please note: Auto-captioning does not constitute an accommodation. Accommodations for captioning must be done by human captioners, not auto, machine-generated captioning.
- To export caption from the Zoom recordings, see Using save captions , which you can pair the caption file with the video file (e.g. MP4) for upload to another location (e.g. YouTube).
- To import caption into YouTube, see Add subtitles and captions.
- If you’ll be sending Zoom panelist invite(s), please contact us for email address(es) otherwise provide us with the generic Zoom attendee weblink for interpreter/captioner to join.
- Demo ICS (Internet Caption Stream) weblink is available here, which can be viewed using a web browser on computer and mobile devices with Internet connection. There is no software and extension/addon/plugin to install. Once a captioner is secured for your event, you will receive a confirmation email with the ICS weblink, which can be shared with participants ahead of time (e.g. email, post on webpage, etc.) and to post in the Zoom chat area at the start of the Zoom session. Captioning will be simultaneously output to both the Zoom session (by enabling the CC button) and at the ICS weblink. For best experience, it’s recommended that participants use a separate device or second monitor to view captioning in full screen using the ICS weblink provided for the session. The ICS weblink provided will work at scheduled time.
- Currently, human captioning does not support a direct encode to an RTMP/HLS stream without the use of a 3rd party cloud encoding provider (e.g. EEG’s Falcon) to provide our captioner with a location to send caption data to.
Zoom Integrated Captioning Instruction Guide
From ordering captions for your Zoom event, to setting up captions for a Zoom webinar, this helpful guide will walk you through the entire process.
Anyone who has not previously ordered Maple integrated captions for the Zoom platform should contact a Maple representative to request service and discuss pricing by email to services@maplecomm.ca or call 844-627-5326.
What’s Covered:
- Enabling Captions in Your Zoom Account – Instructions on how to set up your Zoom account for captions and transcripts.
- Assigning a Maple Closed Captioner & Viewing Captions in Zoom Meeting – Instructions on how to assign a captioner to caption and how to turn on your captions during a captioned meeting.
- Special Instructions for Captioning Zoom Webinars – Instructions on how to set up a Maple captioner to caption Zoom webinars.
Enabling Captions in Your Zoom Account
How to Set up Captions in Zoom
In order to view captions during your Zoom event, you will need to enable the captions setting in the dashboard of your Zoom account in advance of your event.
- Sign in to your Zoom web portal and click “My Account” in the upper right side of the page.
- In the navigation panel, click “Settings” and then locate the “In Meeting (Advanced)” tab.
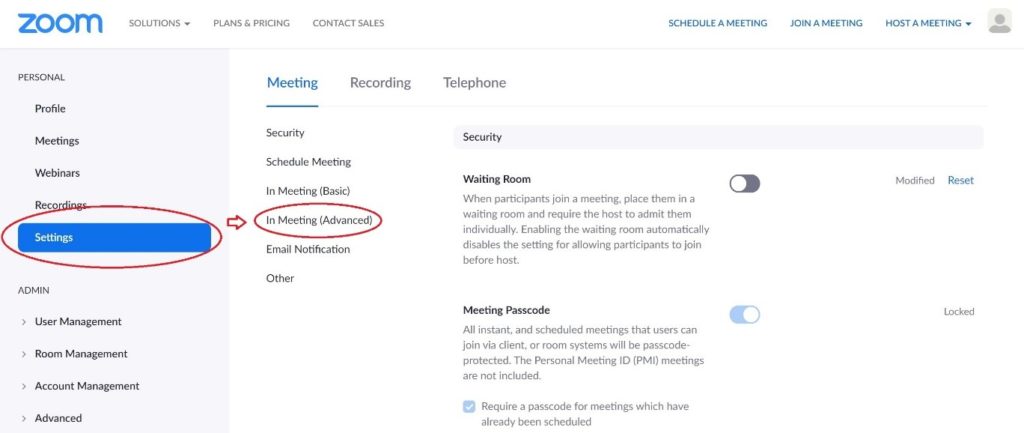
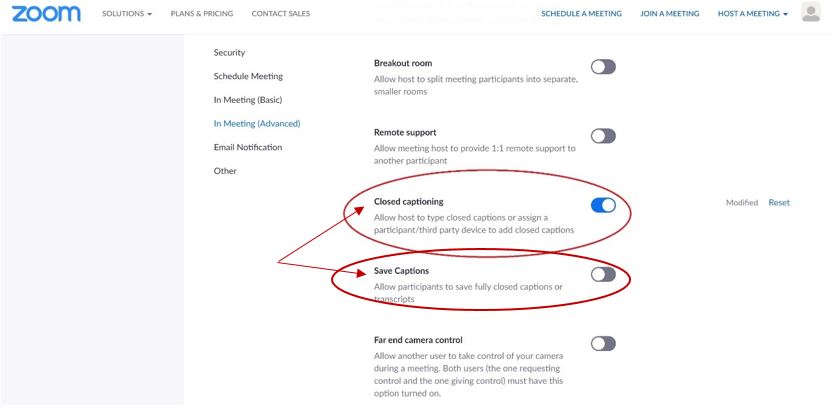
- Make sure that the “Closed Captioning” setting is enabled. (If a verification dialog displays, click “Turn On” to verify the change.) This setting should automatically save for all future Zoom calls. You can also enable the “Save Captions” option from here if you want to allow participants to save the caption transcript. This feature can be turned on just below the Closed Captioning settings.
Assigning a Maple Captioner & Viewing Captions in Zoom Meeting
How to Assign a Maple Closed Captioner to Caption & How to View Captions During a Zoom Meeting
With Maple’s Zoom integrated captions, there no longer is a need for sharing Zoom API tokens. Instead, meeting hosts log into their Zoom events and simply assign our captioner to caption and confirm that test captions are flowing through.
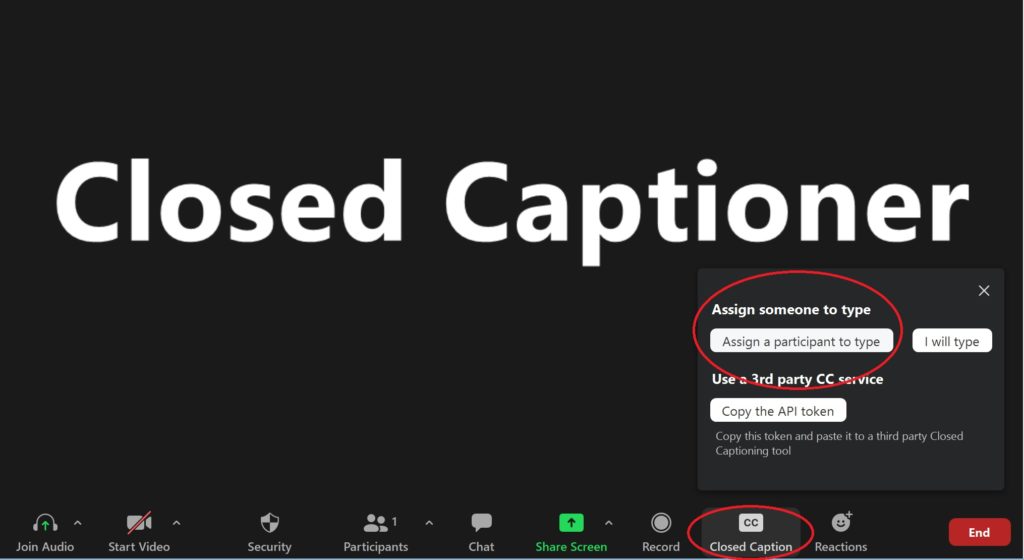
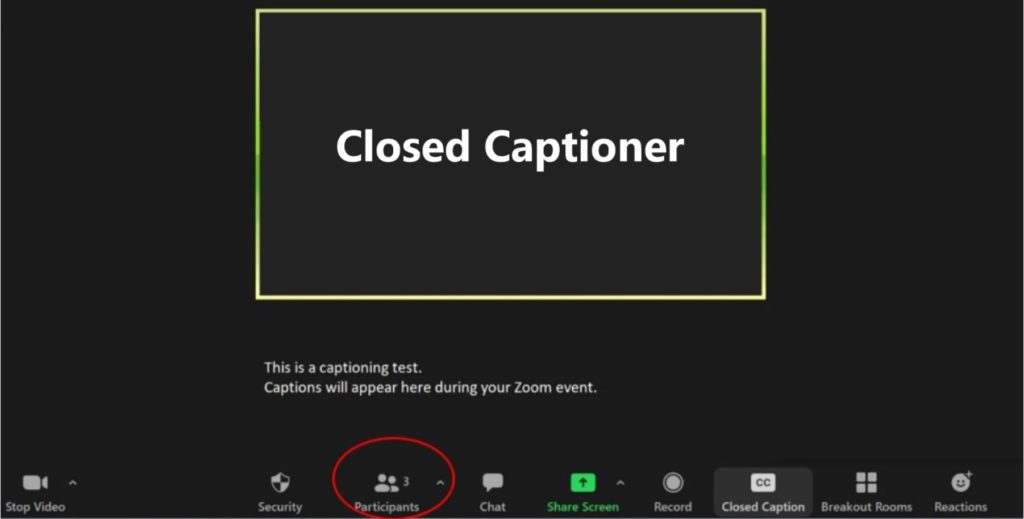
- Start your meeting 10 minutes prior to the scheduled start time. Your captioner will join your event as “Closed Captioner,” a participant on the call.
- Click the Closed Caption icon at the bottom of the screen, and choose “Assign a Participant to Type.”
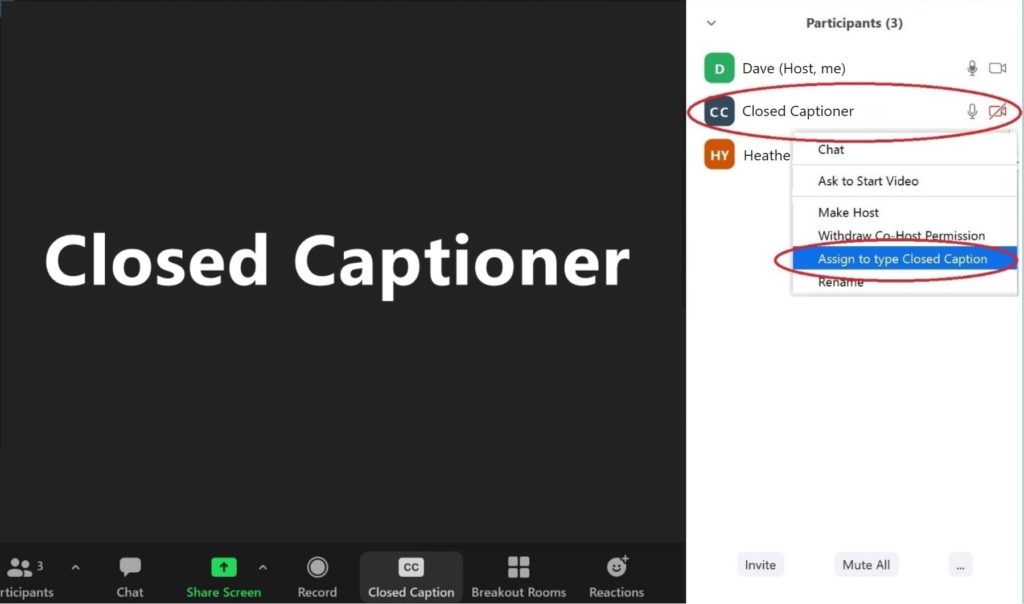
- This will open a window to the right of the Zoom screen that lists the participants on the call. From this list, the host will promote the Closed Captioner as Zoom captioner and select “Assign to type Closed Caption” from the dropdown. Note: if using the Zoom Video Webinar plan, live captioner need to be promoted to “Panelist” before they can be assigned as captioner.
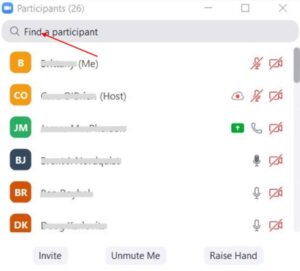
- If you’re in a Zoom meeting with 8 or more participants, you can search for the Closed Captioner if you don’t immediately see their name in the participants window.
- To do that, simply click on Participants from the menu bar.
- A participants window will pop-up. Locate the search bar at the top of the window, enter “Closed Captioner,” then search.
- Next, follow Step 3 (above) to promote the captioner through the “Assign to type Closed Caption” option.
- Your captioner will grab the third-party caption API and connect it via our captioning platform. The captioner will now be able to listen to your Zoom event like every other attendee and caption directly to your Zoom screen and/or to the separate ICS captioning window if ICS was selected during the ordering process.
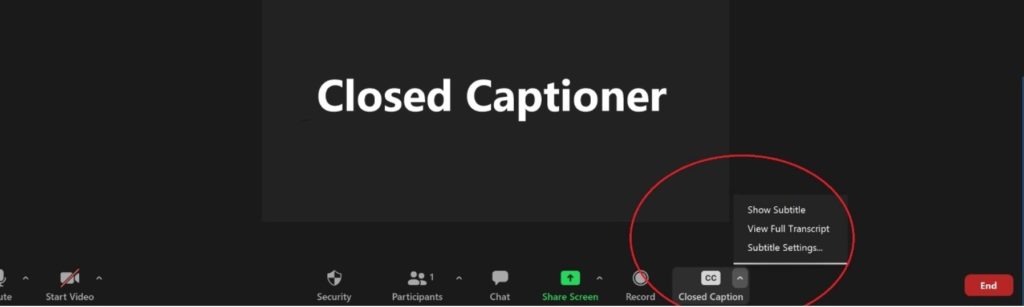
- You now will be able to click the CC button on the bottom right of the screen as the meeting host and select “Show Subtitle” from the menu to see captions on the screen. You also can click “View Full Transcript” to view a realtime transcript of your event.
- The captioner will send a caption test to ensure they are connected, and will communicate via Zoom chat. (Please note that any communication with the captioner while an event is in progress may result in missed captions.)
- Captions will be displayed at the bottom of the Zoom screen.
If you experience any problems with your captions once your meeting begins, please email services@maplecomm.ca or call VITAC directly at 800-590-4203. VITAC is Maple’s captioning solutions partner.
Special Instructions for Captioning Zoom Webinars
How to Set up Captions for a Zoom Webinar
Like Zoom meetings, we offer captioning solutions for webinars as well. There are just a few special steps that the host must take to assign a captioner to caption the webinar. In order to caption a webinar, the Zoom webinar host must assign a Maple/VITAC captioner as a panelist and provide the panelist link as the meeting link on the order site. We’ve identified an easy process to ensure you are able to do this properly.
- Login to your Zoom account.
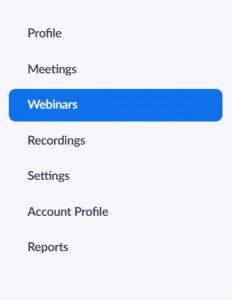
- From the left panel, select “Webinars.”
- Click on your webinar in your “Upcoming Webinars” tab.
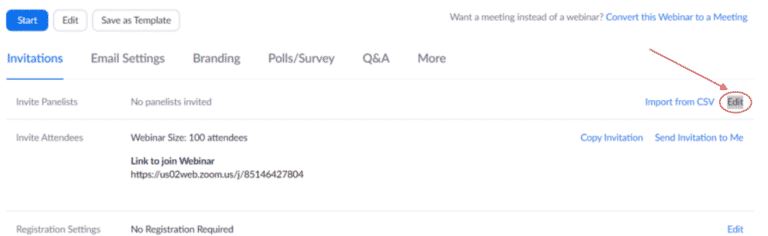
- Under “Invitations”, click the “Edit” button in the “Invite Panelists” section. This is where you will begin the set-up process to assign a VITAC Closed Captioner to your event.
- In the “Panelists” menu, add “CLOSED CAPTIONER” as the panelist’s name, and caption@maplecomm.ca as the email address. Click “Save.”
- You should now see the added information next to the “Invite Panelists” field.
- From here, in the “Invitations” section, click the “Edit” button in the “Invite Panelists” section again.
- Click “Copy” in the panelist entry for CLOSED CAPTIONER. This will open the panelist invitation.
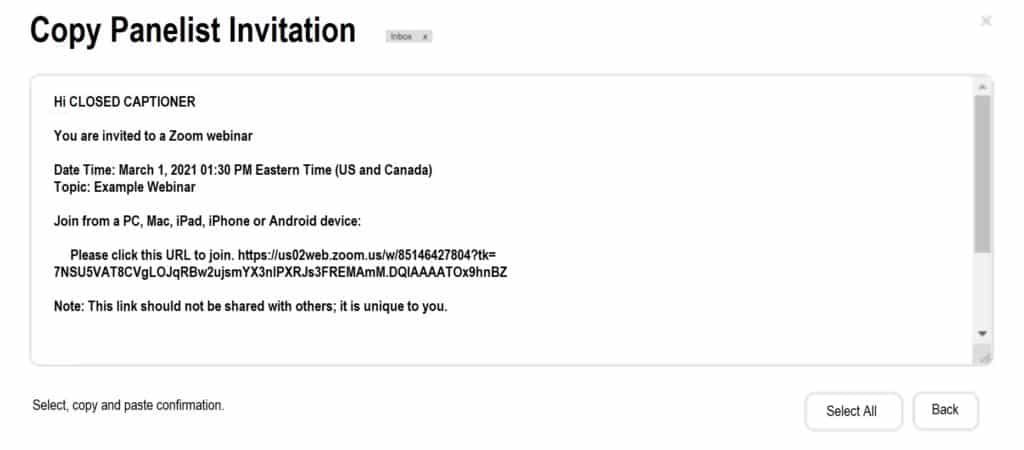
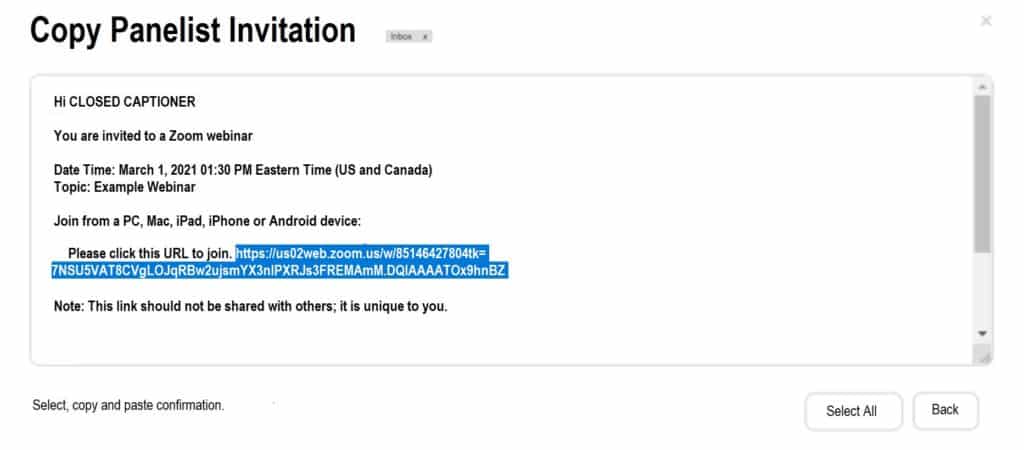
- Select only the panelist URL link in the invitation and copy it to your clipboard. Note: You will need this link when place your captioning order
- Now you’re ready to place your captioning request by sending an email to services@maplecomm.ca , use our Service Request button above, or call 844.627.5326 to leave a voicemail for callback.